Automating HTTP Authentication with AI Recorder
Overview
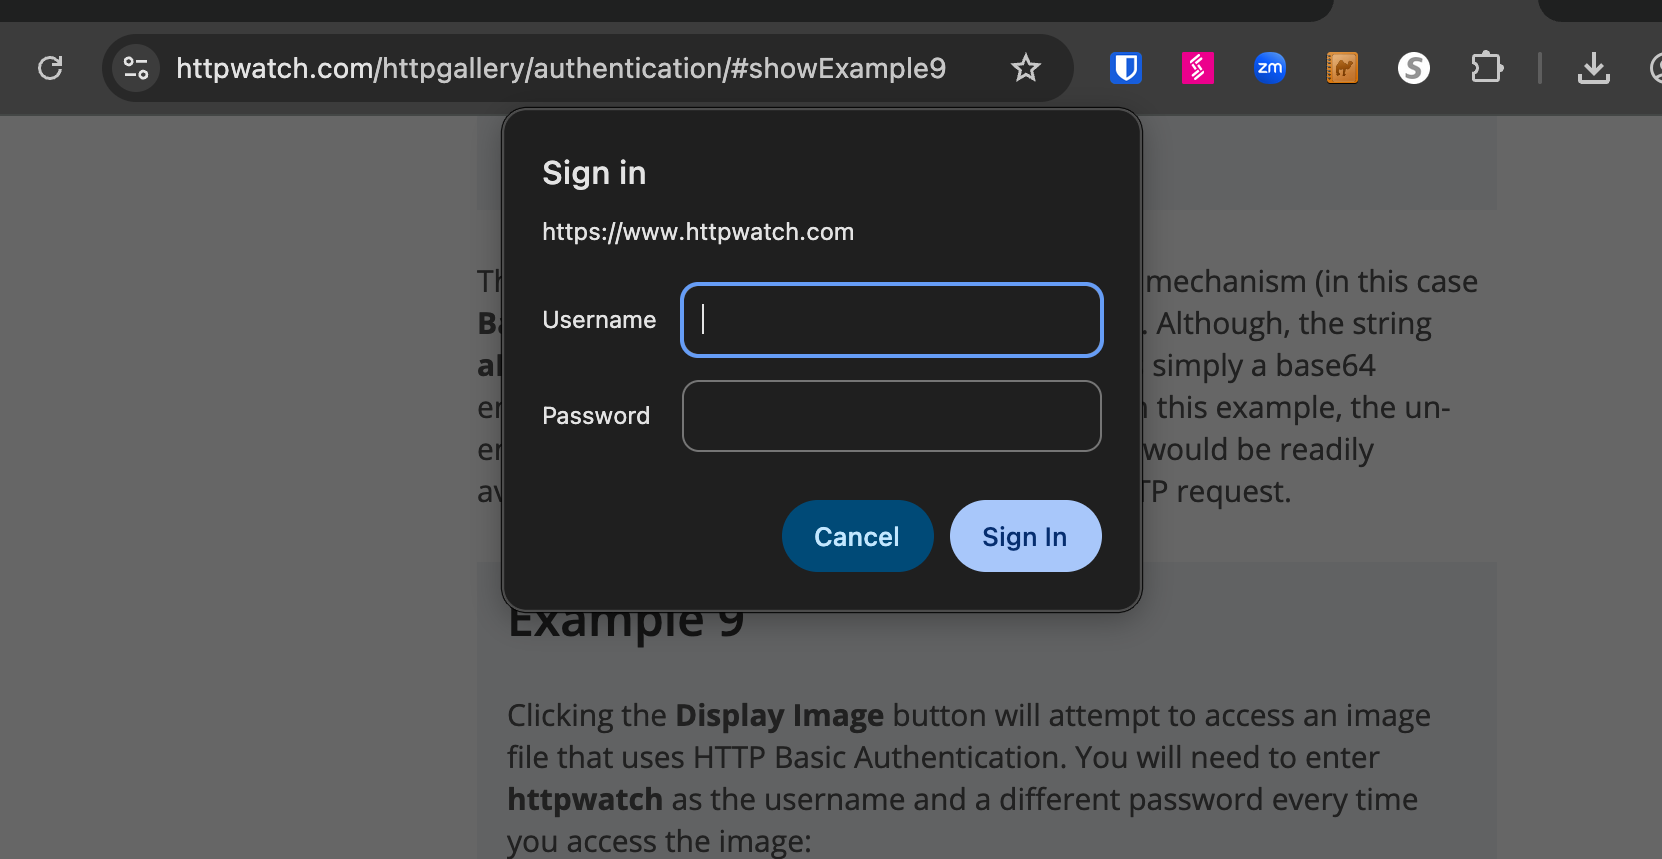
HTTP Authentication is a mechanism used to control access to web resources. When you encounter a website that uses HTTP Basic Authentication, you'll typically see a browser login dialog prompting you for credentials. This guide explains how to automate this authentication process when recording scenarios with BlinqIO AI Recorder.
WARNING
This process is currently only possible with the Mac/Windows client version of the AI Recorder. If you're currently using the Web Recorder, reach out to the support team (email support@blinq.io) to enable client Recorder for your project.
Understanding HTTP Authentication
HTTP Authentication uses the 401 status code and WWW-Authenticate response header to challenge users for credentials. The most common type is Basic Authentication, which works as follows:
The server responds with a 401 (Access Denied) status and includes:
HTTP/1.1 401 Access Denied
WWW-Authenticate: Basic realm="My Server"
The browser displays a login dialog for username and password
Credentials are sent in subsequent requests via the Authorization header:
Authorization: Basic aHR0cHdhdGNoOmY=
Note: The credentials are base64-encoded (not encrypted), so Basic Authentication should only be used over HTTPS connections.
Automating HTTP Authentication in BlinqIO
Instead of manually entering credentials every time you record a scenario on an HTTP-authenticated site, you can configure BlinqIO to automatically provide these credentials.
Step-by-Step Instructions
1. Access Your Scenario's Code
- Navigate to the AI Tests page in BlinqIO
- Select the scenario you want to configure
- Click the Advanced dropdown at the top right
- Select Debug with VS Code
This opens your project code in Visual Studio Code.
2. Edit the Configuration File
- Locate and open the
ai_configfile in your project - Add the following configuration block:
json
{
  ...
  "contextOptions": {
    "httpCredentials": {
      "username": "your-username",
      "password": "your-password"
    }
  }
}
Replace "your-username" and "your-password" with your actual HTTP authentication credentials.
3. Save and Restart
- Save the
ai_configfile - Close and reopen the AI Recorder
The next time you launch the AI Recorder on your website, the HTTP authentication credentials will be automatically filled, and you'll be logged in instantly without manual intervention.